Showing posts with label red velvet. Show all posts

Saturday, 4 August 2012

Adventures in Whoopie Pies: Violet Velvet

I have been meaning to try whoopie pies forever, especially red velvet, and I finally found a recipe that looked like it had all the right elements for a good red velvet cake. It even came highly recommended, from Paula Deen's website. Claimed her cousin Johnnie's whoopie pies were loved all over Atlanta.

Well, golly, y'all, I had to try these!


The first thing you may notice is that these are not red. I was shooting for a violet shade and I think I miiight have overdone it on the food colouring, so they came out quite dark. Oops.


I started out with this recipe, but as I was reading the comments I saw a lot of complaints that the batter was too thin, that the oil - according to Deen's own show, should have been a much smaller amount than what was listed.

So... I reduced the amount of oil I used. We'll see how that pans out.

In any case, I first measured my oil, food colouring, vanilla and vinegar up in a measuring cup and put it aside.

Also, though I didn't get a pic of it, I sifted together my flour, cocoa powder (which I increased to 2 tablespoons because come on you gotta be able to taste it!) and the baking soda together in a bowl and set it aside.


Then I blitzed up the eggs and sugar until they went pale and doubled in volume, like so:


And poured in my much-too-dark coloured oil mixture and mixed until well-blended.


Like so. At this point, I thought I had the colour pretty bang-on! All that was left was to mix in the buttermilk and the dry ingredients in alternating batches, and boom - I had whoopie pie batter!


Now, here the recipe said to 'drop the batter by teaspoons' onto a baking sheet. Teaspoons? You know how tiny those pies would have ended up? This scoop holds about 2 teaspoons of batter, and these still came out really tiny!


So I (mostly) obediently doled out the batter and baked as directed, and was rewarded with these:


Huh, they look pretty okay, actually. Or, they did, until I moved them to the cooling rack and saw that the bottoms were especially crusty... and the cakes themselves were rather dry.


Yeah... Not good eats. So, for the next pan, I reduced the cooking time to compensate. I figured this was because I didn't use the recommended amount of oil.


The second batch came out MUCH better, and I learned that the easiest way to remove these from the pan was with an off-set spatula. I tried with a fork, but it shredded the bottoms.

Nobody likes shredded bottoms.


Time for another, 'Recipe vs Reality' - the recipe claimed this would make 48 cookies, for 24 sandwiches. I see here... 60 cookies. And this wasn't all of them! All told, I had over 6 dozen whoopie pie halves. No, really. I seriously lost count after 72.

Do recall, I made these bigger than the recipe called for. BIGGER. After reducing one of the ingredients. And it made MORE.

Someone messed up transcribing that recipe. Either that, or Paula Deen is lying to us, and I refuse to believe that!


Anyway, once these had cooled a bit, I stuffed them with my favorite cream cheese frosting, and for extra fun, rolled some of them around in non-pareils.


Everything is better with non-pareils.


These went over pretty well with my guests, though I personally wasn't satisfied. They weren't terribly flavorful, were still ever-so-slightly dry, and they weren't nearly purple enough.

I'm not giving up though. I will persevere. One day, I will make the perfect whoopie pies.

...

What is with me and failing with any kind of pie?? These aren't even related to actual pie. What the heck, universe?


Despite their flaws, tho, they were awfully cute. And pretty tasty - especially with a generous amount of cream cheese filling.


And I still ate, like, 7 of them. 7-ish. I don't know, I wasn't counting. It was my birthday, so... yeah. No-one counts servings on birthdays. I think. You shouldn't have to, anyway!

Do you have a favorite whoopie pie recipe? Suggestions on what I could have done better? Drop me an email or leave a comment!

Someday, I will master them, and have perfectly cakey little cookie sandwiches... someday.

Oh well.

Until next time!

Wednesday, 15 February 2012

Valentine's Checkerboard Cake with Tutorial

I wish, wish, WISH I could have gotten this post up sooner so y'all could have seen it before Valentine's Day but I was busy! Maybe if you like this idea, file it away for next year?

Really, though, do you need a specific holiday as an excuse to make a gorgeous, delicious cake?

Of course not.


So remember how when I made those cupcakes and also made layer cakes and put them aside for a later use? This is that use. These are fresh out of the freezer and still quite firm, which is exactly what we want. Yes, you need to freeze your cakes for this application! You'll see why in a bit.

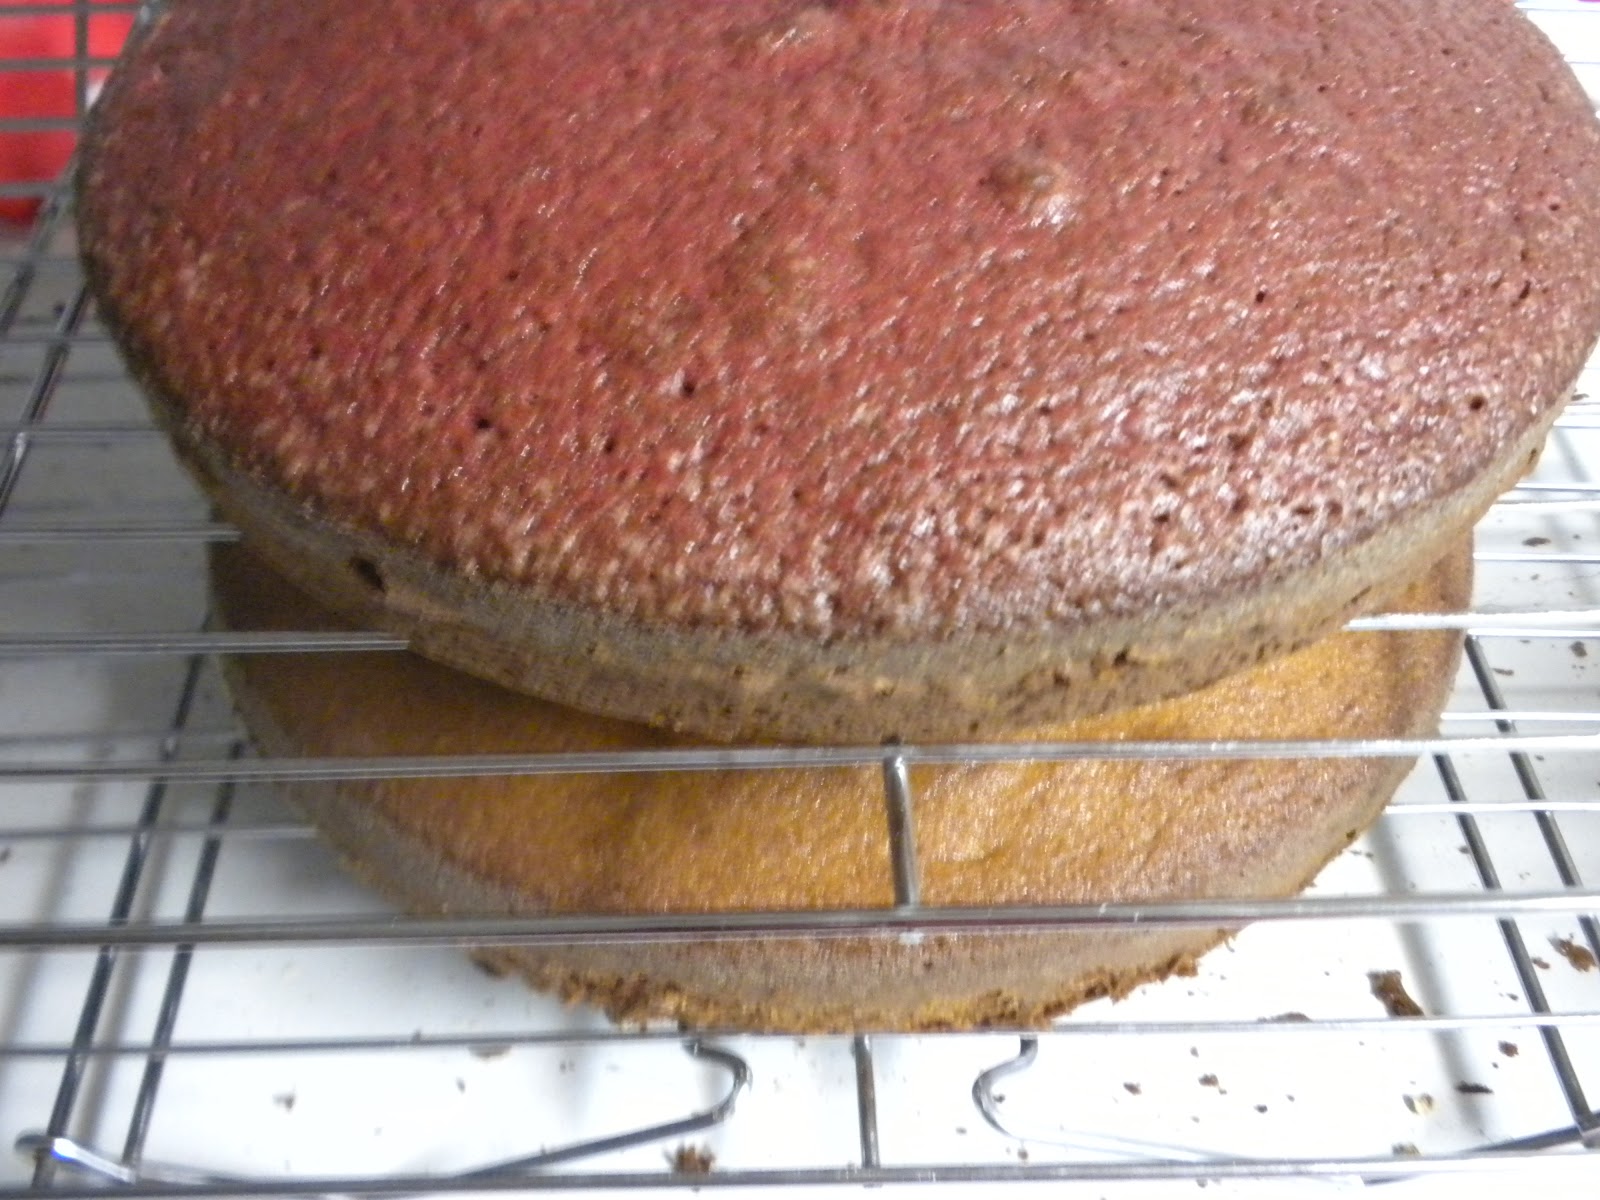
So, start off with two different coloured, different flavored 8 or 9-inch round cakes. These are 9 inch rounds of red velvet and silver white cake.

Trim them to be level, then stack them atop one another.


Now give your cakes a hat. There, we're done! Isn't it cute?

Seriously, though, I used this bowl as a guideline so I could cut an almost-perfect circle in my cake. Before I continue, I need to point out that this whole process was inspired by I am Baker's Vertical Cake Tutorial though I took it in a slightly different direction because I was aiming for a different finished product.

I want this cake to have a checkerboard interior!


I used a small rice bowl for the next circle. Holding the bowl in place I took a long, thin, sharp knife and cut straight down into the cake, following the outside edge of the bowl. If I'd had a tripod or a third arm, I would be showing you a picture of that right now.


I could have stopped there, but I chose to cut out one more circle in the middle, just using a round cookie cutter.


It didn't go deep enough so I had to use it to cut form both sides of the cake... I could have made my life easier here and just used the knife with the cutter as a guide but what are you gonna do.


Then I very, veeerrry carefully pulled the rings upwards one by one to separate them. Now, if we weren't working with frozen cake, the whole thing would simply crumble at this point, so don't skip freezing them for at least 3-4 hours!


Once you have all your rings separated, start fitting them back together, alternating colours as you go.


You'll end up with a neato target-looking cake! (Stay on target. We're too close! Stay on target! B-KOOM! Yeah, that's all I could think every time I looked at this cake. I am a nerd.)

Now, I missed an important step here. Please, learn from my mistake, and don't miss this step!! Before you painstakingly lift one target cake and place it atop the other, brush the bottom layer with a generous amount of simple syrup. Then stack them together. Pour a bit more syrup over the top and especially in the gaps between the rings, as above.


Then wrap the heck out of it in Cling Wrap, tightly, to hold the layers all together. (Over at I am Baker, Amanda tied hers with parchment paper and scraps of cloth, whatever works to keep your cake's layers all closely hugging.)


Then put them back in the freezer for a couple more hours. Yes, this takes time, but it will spare you the suffering I've had to endure. My cake did not hold together well, the layers came apart when served. I did not put the middle layer of simple syrup, I did not pour enough over the top. Perhaps I didn't leave in the freezer long enough.

Please, learn from my mistakes. Don't let this cake tragedy befall your family.

...

Where was I? (STAY ON TARGET!) Right. Once you've firmed up your cake in the freezer yet again, let it thaw in the fridge before starting decorating. Frosting and frozen cakes don't necessarily get along all that great.


Hurry up and thaw so I can frost you! (Stay on target!)

No, I'm not getting sick of that reference. Why do you ask?


Okay, okay, so let's get some frosting on this baby! I tried altering Amanda's recipe to suit my tastes better but the texture didn't come out how I hoped, so anyone who wants to try this: stick to Amanda's Perfect Crusting Buttercream recipe. If I ever get my variation on it right, I'll be sure to share.


I was really on an I am Baker bender when I decorated this too. This was inspired by the cake she made in her Vertical Layer Cake Tutorial to do a simple black-on white, handwritten message, but on top of the cake. Oh, dear, my handwriting needs some practice.

The important thing about these words, though, is that it's the lyrics to my husband's favorite love song. This cake was for Valentine's Day, after all. And if anyone is curious, yes, he loved it!


 I gave the sides some interest by piping simple, freehand, heart outlines all the way around. This is probably my favorite part of the outside of the cake. I may play with this idea further in the future.

So, what does this baby look like when you cut a slice?


Ooooh. I admit it took some finagling to get this shot. Like I mentioned, my lack of simple syrup understanding and foresight meant the layers didn't stay together quite right. So this is a somewhat reconstructed slice.


But, oh, look at that. Gorgeous. Worth the extra work and waiting time, worth all the trouble for sure.

I would offer you some, but I gave out slices as Valentine's Day gifts to people I ran into today, and hubby ate the very last slice after dinner, so... Sorry! But try making your own! It's fiddly, yes, but a stunning effect when you cut a slice and everyone sees the lovely checkering for the first time.

Even though my layers were a little, er, disconnected, it turned out delicious and beautiful and, once again, I learned something for next time. If you try it, let me know how it goes.

And, oh, (slightly late) Happy Valentine's Day, everybody!

Until next time!

Friday, 10 February 2012

Cupcakes Two Ways - Part 1

I still haven't decided what I'm baking for my hubby this Valentine's Day, but I've been batting ideas around.

In the meantime, I made some Valentine-themed cupcakes! I took way too many pictures, as always, so this post will cover the baking part step-by-step, then I'll post about the decorating in the next few days.

So to start with, I dug another recipe out of Great Grandma's crumbling old cookbook. It was one I hadn't made in a while - as I mentioned before, I'm not a big fan of white cake, and this is the whitest white cake I know!

Recipe for Silver White Cake
For all of you who can't read that somewhat blurry mess, the recipe, as I made it, is:

Silver White Cake

2 cups all purpose flour
1 1/2 cups sugar
3 1/2 teaspoons baking powder
1 teaspoon salt
1/2 cup shortening
1 cup milk
1 teaspoon vanilla
4 egg whites

Preheat oven to 350 degrees, grease and flour your baking pan as we have discussed previously, and start getting your ingredients together.

About those pans: I did grease & flour two 9" round pans because I am making 2 batches of cake batter, and only want 20-24 cupcakes, so I'm also going to bake layers and freeze them for a later use.

If you aren't doing this, just pop some cupcake liners into your muffin pan and go to town.


Reason one why I prefer yellow cakes - you don't have to separate the eggs! The actual separating isn't too hard, I just... I really don't like touching eggs and risking getting them everywhere.

So I just crack an egg as neatly as possible - on a flat surface, mind you. Cracking it on the edge of a bowl or pan may cause the shell to puncture into the egg and break your yolks, and then all is lost.

In any case, separate your eggs into a couple of bowls. Pass the yolk carefully back and forth between the 2 sides of the shell, letting the white fall into the bowl, then dump the yolk into another bowl. The smart thing to do is to transfer each egg white into yet another container before you start the next egg, this is so if you do break a yolk, you won't contaminate the whole batch.

I did not do the smart thing, but luckily the one yolk I did drop miraculously did not bust and I was able to fish it out.

An even easier way to separate your eggs is to actually drop the yolk into your cupped hand and let the white fall through your fingers into the bowl. I did not do this, because it feels incredibly gross. But it does work. I've done it before, then I had to scrub my hands raw to get rid of the lingering feeling of salmonella. (Does salmonella have a feeling? No? Well, it does now.)

But I digress!

Once your eggs are separated, dispose of the yolks (or save them for an omelette or a lemon curd or something) and start measuring out your ingredients.


Measure all the ingredients out into your bowl, except the egg whites and 1/3 cup of milk.

Admire your incredibly cute teaspoon measure as you pour the vanilla.


These sweet babies were a Christmas gift from a dear friend - no, not the one who just had a birthday, but one I've known even longer and - okay, I'm just giving them names right now. The friend who had the birthday shall hitherto and onwards be known as "Shanahan" because though that is not her name, it is what I always call her. She may or may not share a birthday with a famous sports dude.

Awesome friend who gave me these measuring spoons for Christmas (along with the sweetest little fondue set, but I don't want to get too off-topic) shall henceforth be known as "Kit." So with that said and done, did you see how the handles on these are little cupcakes?? And that there's little cupcakes engraved in each spoon? I didn't get a good picture of it, but see how on the fronts, the spoon stems say the measurements? On the backs, there are the cutest little hearts! I almost felt bad getting these dirty.

They are definitely the #1 cutest baking accessory I have. So, thank you Kit!!

Now, where were we? Oh, right, cake!


So now that you've got all the ingredients in the bowl - except for the 1/3 cup milk and the egg whites, which are keeping each other company elsewhere on the counter - mix on low speed for about 30 seconds just to get it incorporated, then blitz it up on high for 2 minutes. Scrape down the sides of the bowl with a spatula frequently during all this mixing so you don't end up with random unmixed chunks. It will look quite thick and a bit fluffy when you're done.


Then we can invite the rest of the milk and the egg whites to the party, scrape down the sides of the bowl, and give it another 2 minutes on high speed.


Mmm, smooth, sweet, and oh-so-pale. This batter is ready for baking!


I found these adorable cupcake cups at - of all places - Dollarama! I couldn't believe I could get cupcake cups this pretty for so cheap. I'm not usually one of those girls who squeals for pink and frills, but I guess thinking about Valentine's Day does that to me.


I used an ice cream scoop to measure out the batter, but I accidentally overfilled some of the cups this way, so uh, don't do that.


I didn't forget about my layer cakes - I made sure about half the batter made it into the round pan.

Next up, like the title says, this is cupcakes 2 ways, so I thought I'd try a recipe I keep seeing around the interwebs - Red Velvet. Now, red velvet originated in the Southern States, and only recently has it become popular elsewhere. Your average Joe here in Ontario, Canada, still has never heard of it - unless they're the type that reads baking blogs and sites with American content. Or watches cake shows.

Moving right along. Bakerella recently did a wonderful Valentine's Day cupcakes post, where she made cupcakes that had little Cupid's arrows through them. They were seriously too cute! Check out the recipe and her Cupid's Arrow design here.

I didn't have the resources to do that kind of decorating, but I wanted to try out her recipe, so here goes!


This is our wet ingredients - eggs, buttermilk, vinegar, oil (a whole cup of oil! Dang) and eggs.


And oh yes, red food colouring! The recipe called for 1-2 ounces of the stuff. I've made red velvet cake precisely once before, from a different recipe, and used all 2 ounces of the colouring. It was bitter with the taste of the food dye. This time, I used about 1 1/4 bottles, and as you'll see, it still came out vibrant red!

In a separate bowl, whisk up all your dry ingredients and then pour the wet into the dry.


Uh... I might have put the dry ingredients into a smaller bowl. I was doing all kinds of not-so-smart things this day! I debated pouring the dry into the wet, but worried it might cause some kind of nuclear apocalypse, so I just dealt with the smaller bowl and poured the wet ingredients into the dry. It just fit into the bowl with enough room to mix!


Oh, look at that rich, shiny, satiny, red batter. I wish this image was large enough to be my computer background.


For the red velvet cupcakes, I went with plain white cupcake liners, and used 2 smaller scoops of batter to fill each cup, to try to avoid the overfilling issue I had with the silver white cake.


Again, I didn't forget about the layer cakes! They baked after the white cupcakes, and before the red ones. After letting them cool for a few hours, I wrapped them up in plastic wrap, then aluminum foil, and put them in the freezer.

Still debating what I'm going to do with them....


The silver white cupcakes came out a little flat... I don't know why exactly, I'll have to experiment with ways to make them rise more nicely. The red velvet looked absolutely perfect. Now all I had to do was think of a worthy way to decorate them.

But instead, I put them away and went to sleep. Which is also what I'm going to go do now! This post has been a bit of a marathon already, so stay tuned for part two, our thrilling conclusion of Cupcakes Two Ways.

Well, I mean, as thrilling as reading about me frosting cupcakes can be.

Until then!