Showing posts with label Reese. Show all posts

Thursday, 9 August 2012

You Got Your Peanut Butter Cup in my Cookie!

Now, I am well aware that I am not among the first to do this. Far from it, but please realize I made these cookies under extreme duress.

By which I mean a friend linked me to an article about them on Facebook, and baker-shamed me into making them ASAP.And if you don't believe me, look what someone left on my timeline:


If you'd like to visit the original link Leigh shared, it's here. Now, let's look at that comment again, shall we?


Yeah. No pressure at all. 

So, when I saw that a local store had 8 packs of Reese cups on sale, I knew what I had to do.


These cups are ever-so-slightly smaller than the ones you get in a standard 3-pack, I think, and they worked out really well in this recipe.


Start with your favorite chocolate chip cookie recipe, or use the recipe listed here at Picky Palate, where Jenny has tons of cookies-stuffed-in-cookies inspirations! I found that my personal recipe was similar enough that I just stuck with it.

In either case, you probably have to start with room-temperature butter. I personally was busy with a garage sale and laundry that day, and forgot to put the butter out to warm up, so instead I chopped up my butter into little cubes and left it out for a half hour.


Then I used a hand mixer to beat it into submission, and you know what? It was the perfect consistency. Forget leaving butter out for hours to come to temperature! This was much faster and wasn't much extra work.

(If you're very familiar with making chocolate chip cookies, or you've recently read my Easter M&M Cookies post, you can probably skip ahead a bit, cuz I'm going to go through all the steps for making cookie dough here. Again. Because of reasons.)


As long as I had the mixer out, I used it to cream in the brown and white sugars as well, then switched to a wooden spoon to work in the egg and vanilla.


Even though my arms were sore and tired from garage-sale-manning and laundry-hauling all day, I made myself do the rest by hand because over-working the egg (or later, the flour) could result in disastrously tough cookies.

And, honey, I am the only tough cookie around here!

... Oh, man, that was lame. I should stick to baking.


So anyway, once you've worked in the egg and vanilla thoroughly, pile the flour, baking soda and salt on there and fold together until a firm dough forms.


And add your chocolate chips... Mmm.


So now you have chocolate chip cookie dough. You could just stop here, grab a spoon and go to town (if you're not afraid of raw eggs, dun dun dunnnnn) or you could man up and make the craziest cookies ever.


De-package your Reese Cups. 4 of mine mysteriously disappeared somewhere along the way, but I still had enough to make a dozen of these cookies.


Scoop out one regular-sized cookie's worth of dough onto your baking sheet, press a peanut butter cup on top of it, and top with another dough ball, then press down a bit. Leave lots of space for these to spread because they are going to. A lot.


Once your pan has 6 big cookie dough sandwiches on it, start forming the dough with your fingers so that it covers the peanut butter cup and pinch the dough around the sides to be sure it's sealed well. You don't want the Reese cup's chocolate to melt and run out the sides!


This pic does not convey it well enough, but trust me, these are huge. They are nearly the size of my fist.


For comparison, here's the Reese cookie on the left and a regular cookie dough ball on the right. Dang.

In any case, I baked my cookies at 350 degrees for 15  minutes, and they came out perfect!


Once cooked, let the cookies cool at least 5 minutes before moving them to a cooling rack, or they will fall the heck apart.


Another comparison shot of a regular cookie next to these monsters. I am usually the type to eat quite a few fresh baked cookies because they are just too good but I could not get through even 2 of these. They are massive and crazy rich!
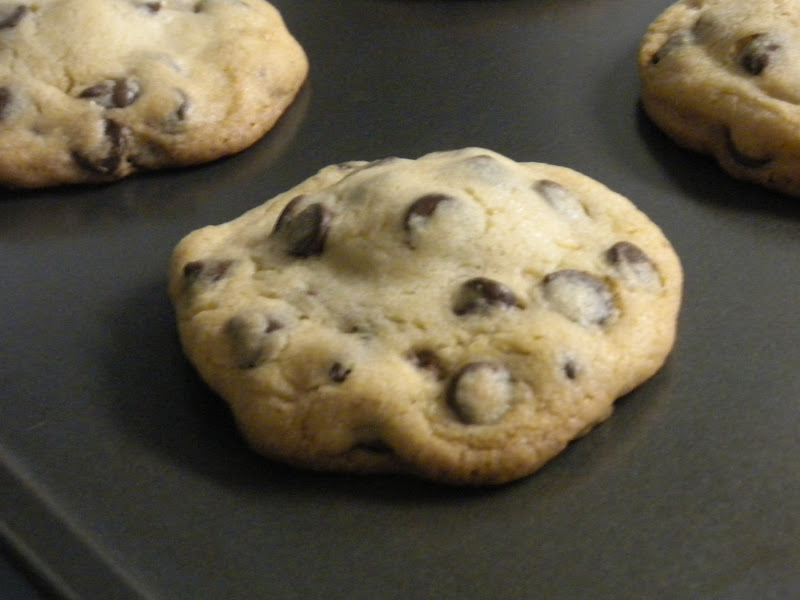

Oh man, look how golden-brown and delicious these look. And once cooled, and cut in half...


You can view the peanut butter cup glory within!

These are rich, giant, and completely excessive. I'm sure the calorie count is through the stratosphere and they have next to zero nutritional value. So of course, I highly recommend them! They are insanely delicious.

The really tough thing about these is resisting eating more than one... because maybe I lost my mind a little and finished that second cookie after all. And maybe my tummy paid dearly for it. But my mouth... oh, my mouth danced for joy!

So yes, try these. But proceed with caution, my friends, for this is a deliciousness from which you may never escape. Or maybe you'll be fine, I don't know. They're tasty cookies, is what I'm trying to say.

So! Thank you, Leigh, for the mad inspiration. Now please never give me another baking idea, my tummy can't handle it! (Just kidding, of course.)

Until next time!

Thursday, 12 January 2012

Let's start things off with a... Failed cake?

Hello all! My name is Tamara and I'll be your Baker in the Basement for the evening.

Or, uh, until I'm done? In any case, moving right along:

I love to bake. It's my one true passion in life. I have just a tad of training from some part-time courses and a lot of home-baking experience, but I'm not going to sit here and bore you with all that. Not this post, anyway.

For this post, I'm just going to say that I live in a basement apartment and I love to bake, and one day I hope to truly claim the title of baker. But for now, here's a cake that turned out all wrong!


This was supposed to look like a big Reese peanut butter cup, as requested by a friend of mine. I should clarify: a friend I've had for over 10 years. A friend who was also my boss at the time since I was helping out with the busy season at the store he manages.

A friend who I right-out slapped because he was bugging me after a long day at the shop. Yup. I felt pretty awful about that and he took advantage of my guilt to weasel me into making this cake. So what went wrong? Well, let's start at the beginning.

Now, I didn't get pictures of mixing the batter (hey, I'm new at this blogging thing!) but that went pretty well. I just altered a yellow cake recipe to include peanut butter - something I'd done a few times before. This time, though, I decided to add peanut butter chips because I wanted to make the cake extra special!

That was mistake number one.


So... first off, right out of the oven, I could see that the top of the cake was a little bubbly-looking... I later realized I had over-mixed the batter. Mistake number 2. But, still, the cake looked moist and well-baked and at this point I thought all was well, until:


Oh, pants. It would not come out of the pan. Both layers were terribly stuck. I'd greased the pans well, I'd baked for the appropriate time, what went wrong here?


Oh... THE CHIPS. They all sunk to the bottom and clung to the pan like vengeful little barnacles. Yay.

Well, I eventually managed to wrench both cakes from their pans relatively intact and trimmed them down to be level.


Once trimmed, I added the first layer of frosting.


I have decided that next time I attempt this cake, I'm going to go with a smoother, glossier chocolate frosting. This cocoa butter cream was a little too rough around the edges.


The next step was to take these little babies and press them into the middle frosting layer, like so:


Now, I'm not going to number this one as a mistake, but I thought these guys were going to be, well, mini-er. So next time I'll have to account for their size a little better - might chop 'em up some so they'll fit into the middle layer better.


As you can see, I had to top it off with extra frosting to level it out.


A LOT of extra frosting!!


Stacked 'em up and slathered more cocoa frosting on there.


Now, I had a vision in my head for the sides of this cake. Nice, wide, vertical furrows just like on the side of a real Reese cup, only bigger! I even had the perfect cake edger in my drawer.

The right size and angle, I knew it would be perfect! If only I could find the darn thing.

To be fair, I did find the right edger. The next day. After the party where I served the cake. So, in the meantime I had to use this less-appropriate edger.


I still got decent striations, but it just wasn't what I'd pictured.


Did my best to smooth out the top, but, again, the frosting wasn't really working with me.


So here she is, complete, a little wonky, and a lot messy. Mistake number - what are we on now?? - was to put this on completely the wrong kind of platter. The edges were raised and it made it practically impossible to get a clean plate edge without digging into and damaging the cake.

So. There you have it.


Now, despite all the little mistakes and mishaps, this cake went over incredibly well. I was officially forgiven for the face-slap. The cake was devoured by all present at the party and the unanimous vote was that it was moist, delicious, and not nearly large enough.

I'd like to make it again, with all the little notes I've made here in mind, and see what I can really do. But that's for another day.

Why did I start this blog with such an iffy post? Such a low note? Because I wanted to show a true picture of where my skill is right now, and that I'm definitely still making mistakes. But mistakes are important! Mistakes are how we learn.

I want to look back at this post sometime down the road, and see how far I've come. I want to figure out how to keep the chips from sinking (tossing them in flour before putting them in the batter has been suggested)  the frosting that will look like real chocolate when it sets, and how to get the perfect furrows up the sides.

And when I can do all that, I'll still know exactly where I started.

Thanks for coming along with me for this journey - it can only go up from here!

Now if you'll excuse me, my banana bread is just about ready to come out of the oven, but that's another post.