Showing posts with label decorated cookies. Show all posts

Thursday, 5 July 2012

Cookies for Bronycon

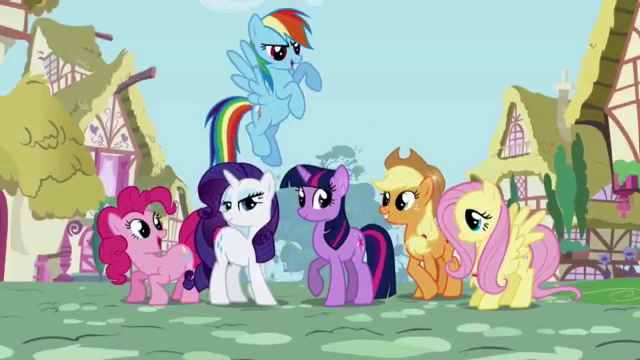
So right away, some of you are wondering, "What's a Bronycon?" Well, this article explains it better than I could, but in short, it's a convention for guys (and gals!) who like My Little Pony: Friendship is Magic.

Yes, you read that right.

And two of those bros who love ponies happen to be my husband and my brother. So when they vowed to attend the convention, I vowed to send along a treat for them and some of their favourite fellow fans. Now if you've ever watched My Little Pony - the classic 80's series, or the new one - or bought one of the toys, you probably remember that the ponies have little symbols on their flanks that represent their talent or true calling. They're called Cutie Marks, and I thought I could make them into some Cutie Cookies!


The first order of business was to bake 3" round sugar cookies and let them cool completely. Then I made some 20-second icing - which I have never done before! - and tinted portions of it in 8 different shades representing the coat colours of the mane six ponies plus a couple of favourite side characters.

Then I simply made a large circle of icing on 6 cookies in each colour and left them to firm up and dry completely overnight. The next day, I dyed some more 20-second icing in the ponies' complementing mane colours and made a pearl border around each icing circle.


This was a 2 (or more!) step process. First, I went in with the darker blue and did dots all the way around, leaving enough space between them for dots of similar size, then let them set at least 20 minutes. Once set, I went in with the secondary colour and filled in the gaps.


For one particular cookie design, whose corresponding pony has rainbow hair, this was a 7-step process! I really, really hope the recipients of these ones liked them because my goodness they were a lot of work!


For some cookies, I started the interior decoration while the first dots were still setting, for others I started once the borders were complete. Working on 8 designs at once, I kind of bounced around from one to the next as I hit upon the right colour combinations in my icing.

Can you tell what these are?


Maybe the stems being on there will help. They're 3 cute little apples. For some reason, these are one of my favourites of the designs!


Some of the Cutie Mark designs, like this triple-diamond mark, took several steps as well. I didn't get full how-to and process pics because I just had so much to get done, but you can see here that I started with light blue diamonds, let them set a while, then went back to add the slightly-darker-blue detailing.

When all was said and done, this set of 48 cookies took over 12 hours of work! But I think it was pretty much worth it. Just look at these finished cookies...


This cookie was undoubtedly the easiest of the bunch to make. It's not totally perfect, but I wub it just the same.


Honestly, a lot of hard work went into this cookie, and I think it deserves a blue ribbon. How do you like them apples?


I'm really happy with how this cookie turned out. It makes me want to smile, smile, smile! Seriously though, this is probably the closest I got to matching one of the mane six's cutie marks.


Let's see... soft violet background? Check. Purple and pink border? Check. Magenta star burst with white accent? Check aaaaand... check! Looks like that's everything we needed to make a Twilight Sparkle cutie mark cookie. Then again, maybe we should review the checklist one more time...


This one is based on one of my brother's favourites, Rarity, so I had to make sure it turned out absolutely fabulous. The border should have been 2 distinct shades of purple, but I couldn't get it quite right! Oh, of all the worst things that could happen, this is the. Worst. Possible. Thing!

... Okay, not really. But I do wish this had come out better.
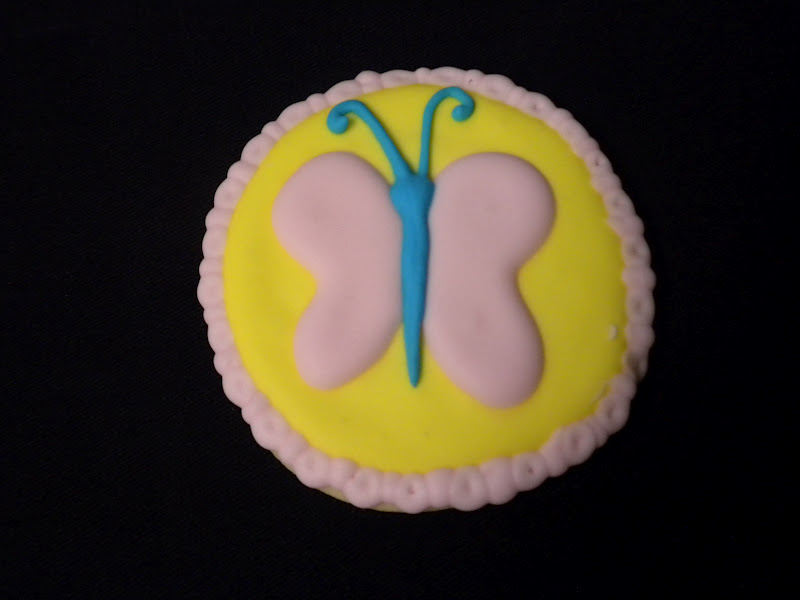

The cookies for Fluttershy didn't turn out as planned at all, there were supposed to be 3 butterflies for each cookie, but the pink icing got too runny and I foolishly tried to work with it anyway, so the wings all spread too much and the borders came out pitted. Oops...

Luckily, this one with just one butterfly turned out pretty well. Yaay! Oops, was that too loud? Sorry.


Here's another one, for a background pony who happens to be a fan favourite, but again I had trouble with the icing consistency and ended up with some pitting and running... I just don't know what went wrong!


I saved my favourite for last. This cookie represents the awesome Rainbow Dash. As I mentioned earlier, it took a lot of extra work to make this happen, but with that rainbow border it is at least 20% cooler than the others.


Altogether, I am pretty darn proud of these if I do say so myself. I think any pony fan could readily recognise who these represent.

Now if you'll excuse me, I'm actually just finishing up this post during my lunch break, so I simply must dash back to my desk. I have to make sure no-one's disturbed my pony collection that I brought in to show off today. The boys brought me back some cool trading cards and pins and...

Didn't I mention? Yeah, I'm totally a Brony too (or Pegasister if you want to be all gender-stereotypey) and now I want to make cookies for all the other background ponies, like Lyra and Bon-Bon and Carrot Top and Doctor Whooves and Mayor Mare and...

Oh, right! Back to work with me.

Until next time!

Sunday, 13 May 2012

Flowers for Mom: African Violet and Pansy Cookies

Now, I don't usually start with a shot of the finished product, because I'm a big fan of suspense, over here, but get an eyeful of these:


These cookies sprung initially from the mind of my coworker and pal Bonnie, who asked me to make cookies for her to give to her Mom on Mother's Day. At first it seemed a simple request, just, "Hey, do you think you can make cookies that look like flowers? Purple flowers? Like, pansies and violets?"

And I, in my incredible ignorance of all things flowers, replied, "Flower cookies? Sure! What could be simpler?"

Then Bonnie showed me some Google image results for pansies. 

Oh.

Pansies are actually kind of complex. Well, Bonnie, challenge accepted!


Despite my initial bravado, I actually decided to start with the violets as a warm-up. I couldn't find a simple 5-petal flower cutter (seriously, what the heck?) so I started with a round cutter and made notches for the spots in-between the petals.


Admittedly, this was not the look I was going for. The petals came out more square than I had intended. I need to go on a serious flower-shaped-cookie-cutter shopping spree.

But in the meantime, I had to make these look something like violets.


I piped onto the somewhat-misshaped cookies a better approximation of the violets' outline and filled with flood icing in - you guessed it - a shade of violet. Real violets are not flat, of course, so to try to give the illusion of the center being recessed, I added a spot of darker purple flood icing in the middle while it was still wet.

After the flood icing had set up for 15-20 minutes, I went back and added the lines on top for a bit of petal definition and three dots of yellow icing to each for the stamen.


Et voila, Viola, vive le violets! (Apologies, an avid aficionado of alliteration.)

Now, before I start showing you the pansies, have you ever seen a pansy? I mean, and really looked at it? Tell me, have ever really, really really ever seen a pansy?

They're bizarrely asymmetrical. They look like they have evil little faces. Look at them staring into your souls with their eyes of pure darkness and gaping mouths!

Okay, so I'm being a wee smidge dramatic here, but come on. I was pretty intimidated about making those into cookies!


I again started with a simple round cookie cutter, and trimmed bits away until I had the general shape.


Then, using a smaller circle cutter, I cut half-moons to add on as those weird additional layered petals pansies seem to have on one side (freaky, I tell you.)


If you looked at the sample pics of pansies, you may have noticed many varieties are multicoloured. Bonnie was really going for an all-purple assortment but I weaselled her into letting me do some white & purple pansies for variety.

So, as you can see above, I outlined the white petal sections in white, and the purple in purple. Pretty straightforward so far.


Fill in with thinned royal icing to match the outline, then, while it is still wet, add a yellow blob of flood icing for the center, and contrasting highlights to some or all of the petals.

Sorry for the cookie switch out, folks, took photos of different cookies at different stages. You know how it is.

Once you have your contrasting colours down, take a toothpick, and using quick strokes pulling from the center out, and then from the highlight colours inwards, work the icing until...

Well, until it looks like a pansy! It's hard to explain, really, I just kind of fiddled with it until I got this:


So basically, if your cookie looks a little like it has a streaky smiling monster face on it, you're on the right track.

For some of these, the yellow centers got a little too muddy with all the streaking. If that happens, just blob on a tiny bit more yellow icing while it's still wet.


The technique is pretty simple once you get the basic shape and look of the pansies down, which I'll admit, took a couple of tries. Luckily, I always make a few extras for just such practice, and there's always someone happy to help hide the evidence when mistakes are made.

But a bit of practice and perseverance, and...


Practically perfect pretty pansies, plus they're palette-pleasing! (Sorry, I just can't help myself.) 


I really hope these go over well. I know if I were a mom, I'd be pretty touched to get my favourite flowers in food form. All credit for that thoughtfulness of course goes to Bonnie!

Now if you'll excuse me, I need to go prep to make my Mom's very favourite coffee cake for brunch in the morning. If all goes well, I'll let you guys in on it.

Until next time!

Monday, 7 May 2012

TCAF: Of Comics and Cookies

Hello, friends. Have I ever mentioned what an absolute comics fanatic I am?

I am an absolute comics fanatic. And I don't just mean I read X-Men comics from the 90's (though I certainly do) but I mean I am mad about all kinds of comics, especially independent stuff that really breaks away from the traditional 'muscle-bound dudes in capes and skimpily-clad sexpots fight evil' stuff.

So, man, am I ever lucky to live in Toronto, where every year I can visit the Toronto Comics Art Festival and meet & chat up my favourite artists! This year, though, I was a little broke. Work had been scarce lately, so I couldn't go and purchase my usual metric tonne of new comic books and graphic novels.

Sigh.

I still wanted to go, though. But I needed to do something for my favourite artists. I would feel so bad just saying hello and not buying anything, and not doing anything for them. So at the last minute, the night before the event, I started decorating cookies.


Unfortunately, since I was so short on time, I didn't get to do cookies for all my favourite artists, but I promised I'd make it up to those I'd missed at the next festival/convention.

Anyone recognise what any of these are? Well, if not, don't feel bad. I didn't expect there to be huge overlap between my lovely, baking-lovin' readers and us comic fans. I'll break it down for you though, because if you have any love for comics at all, my friends, these are among the best!

First, the cookie cutter that inspired it all:


I've had a big 100-piece cookie cutter set for years, but only noticed the other day that this cutter bears an uncanny resemblance to a character in one of my favourite online comics: Dinosaur Comics! Written by the extremely witty Ryan North, this comic is basically the same 6 panels of clip art dinosaurs having ridiculous, philosophical, inspiring, and/or completely inane conversations. It is hilarious, and I cannot stop reading it.

Thus it began. If I was going to make a cookie for Ryan North, why, I needed to make one for everybody!


I had to get creative with the shapes for some of these. The T-Rex, cat and basic shapes I had, but the shamrock and heart-with-ribbon took some custom cutting.


It took 2 tries to get the icing on T-Rex right. This still isn't an exact likeness, but the previous one, well, just be thankful I didn't bother with a picture. I don't wish to be responsible for your nightmares.

Now, just what has caught T-Rex's eye?


Wuh-oh, Cricket! Might wanna get out of range there. The cute li'l black & white kitty cookie is based on Cricket, Yuko's cat, from Johnny Wander. This comic is an autobiographic comic by and about Ananth and Yuko, and sometimes they show previews and snippets from some of their other work. It is funny, cute, and always charming. And gosh, I love that cat!

It is totally worth checking out.


For this cheerful little cactus fellow, I needed reference since I was icing him onto a plain oval cookie. It's hard to see, but I used a toothpick to scratch out an outline to ice over. 


And voila! This my friends, is McPedro, the sassy talking cactus with a Scottish/Irish/Scirish accent from the brilliant comic Girls with Slingshots. The comic is about 2 girls, cynical Hazel and optimist sweetheart Jamie, and their groups of friends and adventures. It's meant for college-age or older readers, mostly, though, and is sometimes a bit adult, so if you're offended by frank talk about sex lives, ehhhh, maybe go read this next one instead.


This little pot is called, well, Pot. He's the living, silent, loyal cooking device of the intrepid explorer chef Rutabaga! This is a relatively new comic by writer and artist Eric Colossal, but I am head-over-heels-in-love with it already. It's a cute, cartoony comic about a chef who tires of the usual fare and goes exploring for new and exciting ingredients in a fun fantasy setting. A probable PG rating on this one guys.

If you love fantasy, cooking, and humor, Rutabaga is an absolute must.


This is... eh... uh... pardon me while I dissolve into nervous giggling for a moment.

Okay, I think I have it out of my system now. I'm not going to link directly to this one, because I really want to keep this blog PG. Really I do. So, uh, if you don't mind a rating a bit higher than PG, highlight the space below.

This is from the amazing comic Chester 5000 XYV by the fabulous Jess Fink. This comic centers around a lonely young Victorian-era bride whose husband is simply too busy for her, er, needs. So he builds her a robot to keep her company. And boy, does he EVER! 

(Keep scrolling, PG fans!)

So there are many naughty, naughty, explicit scenes of robot and non-robot love. Did I mention the entire story is told without dialogue? And done extremely well? And that the characters are relate-able, lovable, and that the story is compelling? And that the sexy scenes are really, really sexy?

Google it, my adult-entertainment-friendly friends. Chester 5000 XYV. Okay, back to cookies and behaving now.

And for those of you who did not highlight and are happy to skip whatever naughty info is hidden there, this is simply a fancy keyhole. Moving on.


This is the symbol of the Sincerists, a fictional group of folks in the alternate universe crafted in Templar, Arizona. This group of folks tells the truth, all the time, no matter how blunt or brutal. I both love and hate them.

This comic is for adults, too, lots of swears and adult situations. It often deals with unhealthy relationships and substance abuse. And it. Is. INCREDIBLE.

The story centres initially around a young man named Benjamin who is trying to start a new life as a writer, in a new town. Then we meet his neighbours, and learn about the crazy, and yet entirely believable, world that Spike Trotman has written, illustrated, and brought to sparkling life. I don't want to give too much away, but it is a wild, emotional, hilarious, touching, disturbing ride. You've got to check it out. You will be amazed.

The only downside was, well, I messed up. Spike didn't come to TCAF this year, and I missed the memo. Oh well, guess I'll just have to eat this delicious cookie myself. Life is too cruel.


Well, gee, these cookies look kind of boring, huh? Just random words on blank white cards. But maybe they'd be more interesting if I told you that they were actually 100% accurate death predictions? Then what? What would the world be like if you could actually know, ahead of time, how you would die? This morbid yet fascinating scenario is explored in a soon-to-be-2-volume collection of short stories called Machine of Death.

I can't even explain it to you fully. If the above premise sounds at all interesting, just click the link. I will add, though, that the idea sprung from the head of the aforementioned Ryan North (in a Dinosaur Comic strip, actually!) and that David Malki ! (the punctuation is part of his name. I don't know, either) was a co-editor for the books. I shared the cookies between the two of them, and saved one to go with the following:

Sorry for the poor quality, I missed getting good pics of some of these because I was just so exhausted!

Hope no-one's squeamish. That's a shamrock spattered with blood. What the heck, right? Well, if you're an Irish ninja on a cold, cold, day, and you're all out of shurikens, sometimes a frozen shamrock just has to do! What the heck am I talking about? Dr. McNinja! It... it is exactly what it sounds like. A crazy, ridiculous, action-humor comic about an Irish-American ninja, who is also a doctor. His is a conflicted life.

And Chris Hastings, the awesome author and pencil-wielding-dude behind it, was also one of the many artists involved with the Machine of Death books.


Despite the fact that I was trying to save money, I did bring home some sweet, sweet swag. A preview of the next Machine of Death book, a beautiful and sassy print by Jess Fink, fun sentence-building magnets based on Dinosaur Comics, a lovely quickie sketch of my favorite Girls with Slingshots character, and of course, volume one of Rutabaga! Which I have already devoured, and I hunger for more.

The magnets with the dress-up bear are from a comic called Sam and Fuzzy, which started as a comic about a cabbie and his talking bear friend, and evolved into something involving TV stardom, metal bands and their roadies, and a ninja mafia. That's the best I can do to summarize a comic that's been running 10 years! Also, I should mention it is fantastic. And that I suck and did not make a cookie for the creator, Sam Logan. But I will, next time he's in town, and it will be fantastic.

The little set of buttons is from a hilarious comic called Bear Nuts by Alison Acton. The best way I can describe it is... picture if the Carebears weren't about love, caring and sharing, and rather, were about self-medicating, or being lecherous, or crazed, or drunk all the time. Sound fun? I thought so. It is of course, not a comic for kids. I am SO looking forward to making the cookies for it though. Click over for a minute if only to look at how bright, cartoony, and wonderful her art is! It is going to make great cookies!

Okay, if you made it through all that, you are such a trooper! And you deserve to see something actually baking related.

I finally, finally got my hands on this book!


I have wanted this book since it was first mentioned on the Cupcakes Take the Cake blog oh so many years ago (at least, I'm pretty sure that's where I first heard of it, it's been a while!) and at last it is mine!

I "discovered" a little shop called The Cookbook Store, right across the street from the Toronto Reference Library, where TCAF is held. No-one ever told me there was such a thing as a store that sold only cookbooks! I would have spent hours perusing if my poor brother wasn't waiting impatiently outside the shop for me. 

If you're not in the Toronto area, you can of course find Hello, Cupcake! online. 

Now, if you'll excuse me, I have some comics and a cupcake book to read. I cannot wait to make more comic cookies, and goodness knows what kind of cupcakes I'll make next!

Coming soon for sure, though, is a how-to on royal icing, and possibly a post about lava cakes? Can't decide, just now... must read about cupcakes!

Until next time!

Friday, 6 April 2012

Easter and Baby Shower Sugar Cookies

Sugar cookies are becoming a thing with me. A thing I am making all the time. A thing I am having more and more fun finding ways to decorate. A serious thing, my friends.

At work, as part of an Easter fundraising drive, my co-worker Leigh and I were asked to make an Easter prize basket, with assorted Easter goodies. Leigh is the queen of fancy baskets, by the way, she can make an assortment of just about anything look professional, desirable and expensive, whatever the budget.

Me? I'm not so good at baskets. My immediate thought for my part of the prize was these:


D'aaaaaaw would you look how cute that itty witty bunny is - I mean, uh...

Let me start again.

Using the same outline & flood technique I did on these cookies I simply decorated appropriately shaped Easter sugar cookies in soft, sweet pastel colours of royal icing.


I kept these pretty simple & quick to decorate since I knew I had another task that same evening. My Mom sprang it on me a tad last-minute that there was a bit of a baby shower going down at her workplace.

"A baby shower?" I said, "I don't have little carriage-shaped cookie cutters or bottles or anything, what kind of cookies do I make for a baby shower?"

"Well," My mother retorted, cool as a cucumber (who the heck came up with that expression, anyway? Cucumbers are dorky at best) "You could do umbrellas."

So let's get literal here. Baby shower =


Babies.

Some of which appear to have gas.


And umbrellas to protect them from the 'shower'.


I spent a lot of time putting the details into these, simple though they are, so I can't help but show them off a bit. I wanted to make them as pretty as possible, I mean, how many baby showers are you likely to get in a lifetime? Probably not that many. I wanted these to be pretty special.

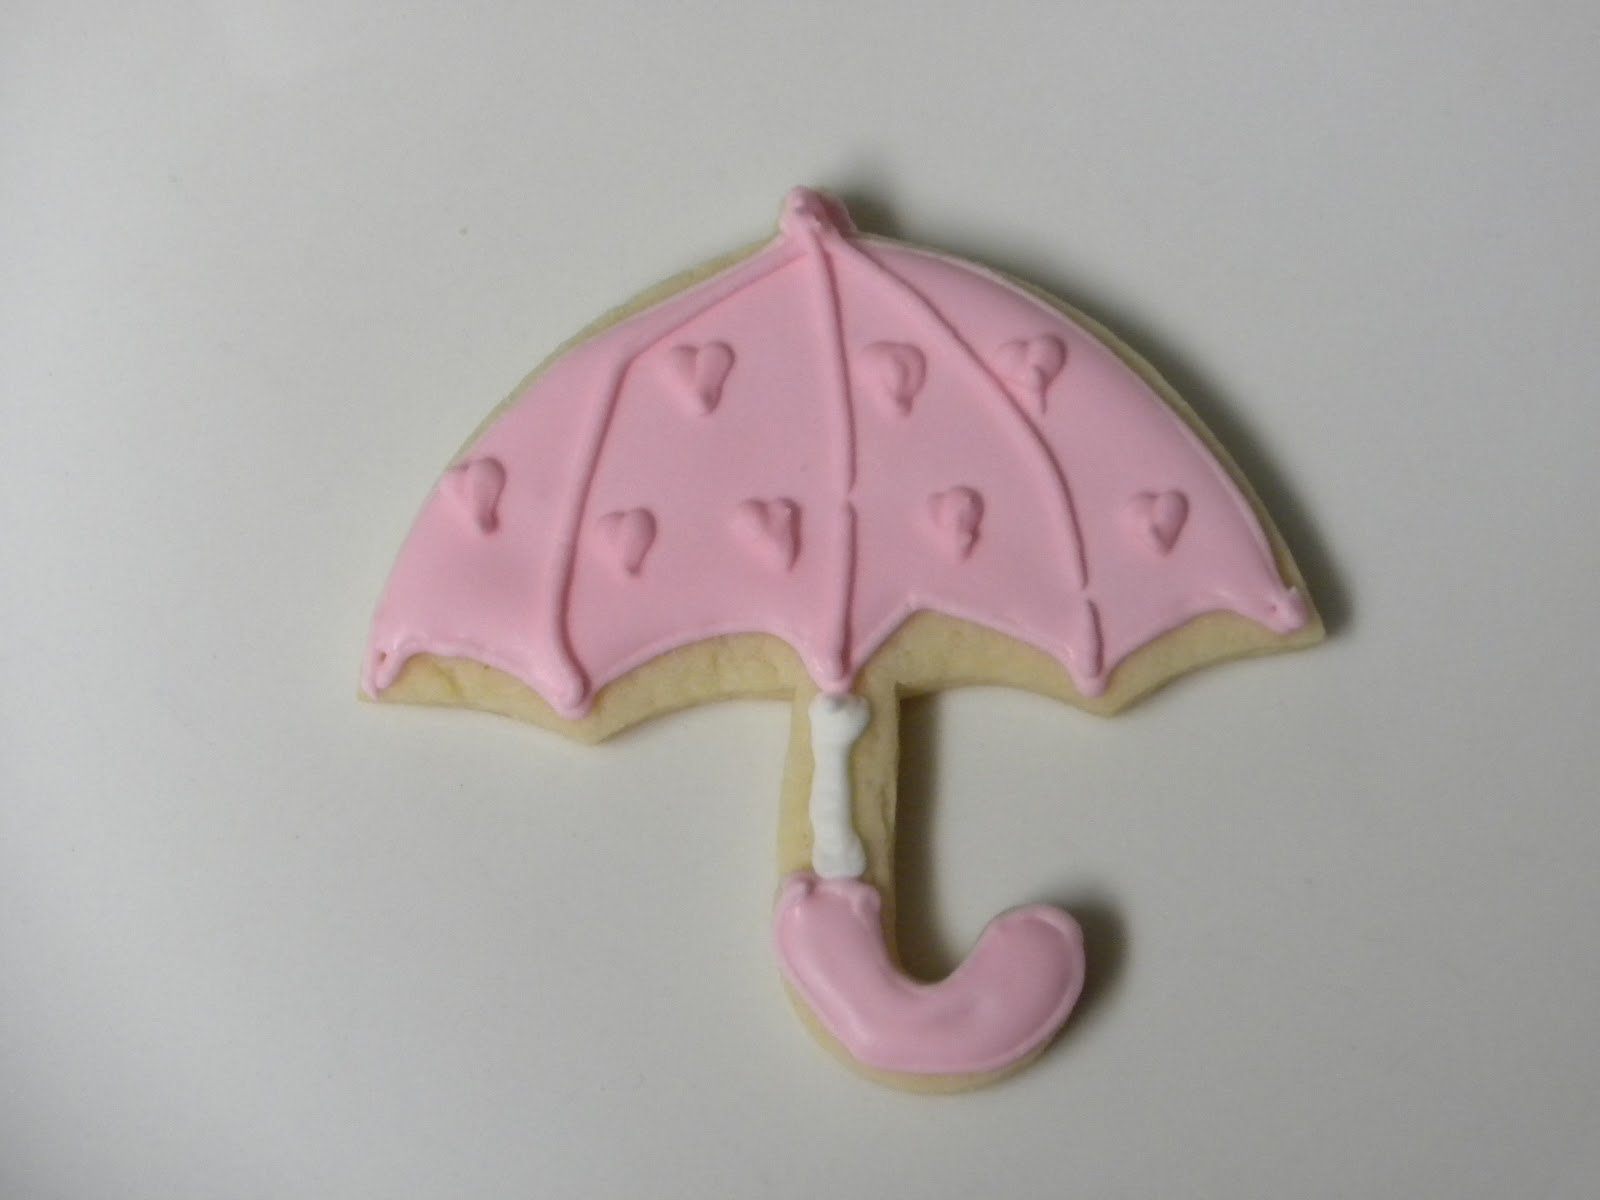
The yellow umbrellas - a gender-neutral colour my Mom specifically requested since we didn't know what type of baby was expected - I outlined and filled, and after they'd set for about an hour, I went back and added the 'wire' lines on the umbrella and the simple dot pattern, as well as the handle stripes and pole.


For the pink umbrellas, once they were similarly outlined, filled and set, I added little hearts in a somewhat random pattern.


And finally, for the blue umbrellas, what could be more appropriate for a shower than little raindrops?


Well, that's spring for you: Easter, rain, and babies. Keep dry, my friends.

There's a super sweet cake coming up soon, if all goes well, so do stay tuned!

Until next time!