Friday 29 June 2012

Dessert for Dudes: Cookie and Cake and Tacos

Okay, so before we even get started here, you need to know two things. One, this post was made as part of  Dessert for Dudes month started by Bridget of Bake at 350 so check that action out! Much kudos to her for helping to inspire this idea! When she invited her readers to participate, I wracked my brain to think of a culinary delight the men in my life enjoy, and it kept coming back to tacos, so here we are.

Thing two - I am smack dab in the middle of a 13-day workweek (no joke!) between my two jobs, and haven't had a good night's sleep in ... uh, I'm not sure. So if this post seems a little rushed, I completely blame that! The cool news is one of the reasons I haven't been sleeping is because I've been up late baking... next week I'll have some neato cookies and possibly some (late) Canada Day cupcakes to share so hopefully that'll make it up to y'all.

Now, on to the post!


I started off by making a tuille batter for the taco shells. I used the recipe from the Sprinkle Bakes book, but as you'll see, I had some trouble with it, so I don't want to share the recipe just yet until I figure it out properly. But definitely have a look at Heather's book! Everything else I've made from it - including these fruit sushi - has turned out amazing! Tuilles are just a smidge beyond my skill at the moment.

But I digress. The tuille batter has to chill in the fridge for a while, so while it was doing that, I started prepping the other taco parts.

I don't know what happened with the lighting here. Maybe I'm being abducted by aliens?

Brown 1 lb of ground beef... Okay, no wait, don't do that. That would be gross in dessert. Instead, buy or bake a 9" chocolate cake and crumble it by hand into a large bowl. I just used a box mix and made 12 cupcakes (because my mom was craving cupcakes that day) and used the rest to bake this one layer. I usually make everything from scratch but, well, this was a bit of a big project and I was on a time limit so sacrifices had to be made!

That light again... did someone open the Arc of the Covenant off-screen? Jeez.

Just so, and set aside. Now, we have to work on the tuilles.

Oh boy.


You want about 2-3 teaspoons of batter per tuille, my 1-inch scoop held about 2 teaspoons. Drop them onto a large tray that's been greased and lined with parchment paper. Make sure they're spaced well, because you're going to spread them into circles with a spatula until they're nice and thin.


Now, it's possible I spread mine a bit too thin, or perhaps my oven runs a tad hot because...


The first two batches came out looking like this. Burnt, crisp, and non-flexible. They have to be flexible, you see, because we need to curve them into taco shell shapes.

So I had to lower my oven temperature a bit and keep a really close eye on the following batches.


When my tuilles came out of the oven not-burnt, I had to work quickly to fold them into taco shapes. Yes, I burned my fingers a bit, but you have to work while they're hot! Also, my fingertips were fully recovered within an hour of finishing these so it was no big deal, really.


So, fold them over a-la-taco, and then drape them over a greased surface to help hold their shape.

One of these days I'm gonna figure out how to focus this camera, I swear.

The shell kept trying to fan out when I just draped them over my wooden spoons, so I placed them over some small square dishes and held the shells still with whatever clean glassware I had on hand. Be creative and set up your 'forming station' with whatever you have handy!

The tuilles will cool and hold their shape within a few minutes, then you can remove them and start your next batch.


This was actually the end of day one when I made these, so I piled the tuilles into a large tupperware container and sealed them up for the night.

I found that they were a little softer the next day and lost much of their crispness - I don't know if this is because of how I stored them or just because I didn't make them quite right - like I said, still learning tuilles!


Remember that cake you disassembled? Time to play with it again! For anyone who's ever made cake balls, this will seem familiar. Put a bit less than half a can (or less than a quarter recipe) of frosting in, and mix until it forms a loose dough. You can make this a little less frosting-filled than cake balls since the dough does not need to hold together that well, just enough to resemble browned ground beef.


I would like to note that I'd use devil's food cake or another lighter-coloured variety of chocolate cake next time, this came out really dark!


To add your beef to your taco, smear a touch of chocolate frosting in the bottom of your shell to help hold the 'meat' in place.


Then press your desired amount of beefy (chocolatey) goodness into the shell, and you have a taco! A... a really plain and boring taco. We need some toppings over here, stat!


I made shredded lettuce by rolling out green fondant, then laying it over some crumpled-up and then un-crumpled but still textured aluminum foil and rolling it again. Ta-da! Lettuce veining! Then I simply cut thin strips to resemble shredded lettuce.

You could of course, use green-coloured shredded coconut to look like lettuce, but my bro Duck don't abide coconut, so I had to work with what he'd like, of course!


I don't like to toot my own horn too much, but look at the genius displayed here. To imitate grated cheese, simply let a ball of yellow fondant sit out for 10-20 minutes until relatively firm, and grate it just like cheese! When it gets too soft to grate, let it sit again for a bit.

This was super fun and seriously - does that not look exactly like grated cheese?! I also cut up some little spheres of red fondant to make tomato, but that wasn't as successful... If I figure out how to make convincing fondant tomato chunks, I will be sure to inform you!


So, lay out all your ingredients, including your adorable tiny frying pan full of cake-meat (that sounds so wrong) your fondant veggies and cheese...


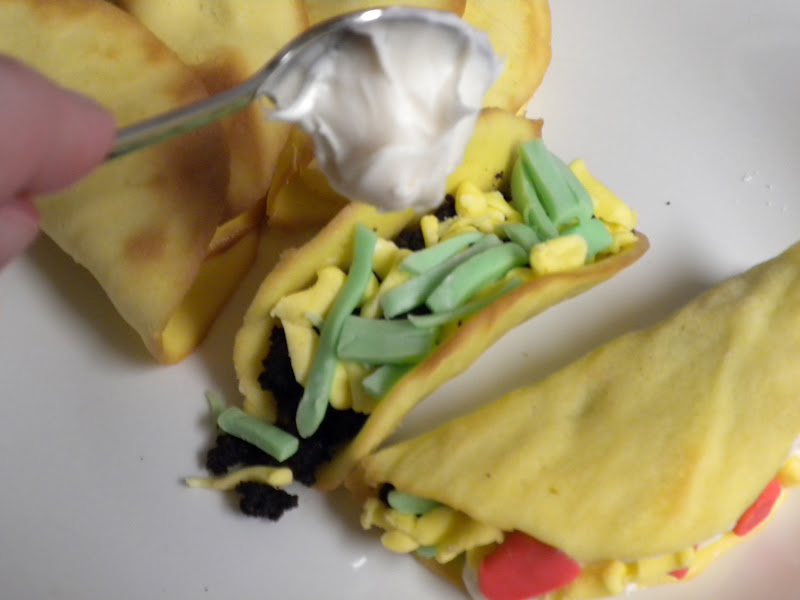
And of course generous dollops of sour cream... Which is, of course, frosting! Cream cheese frosting in this case but you could use any white frosting you like. I totally used store bought here, because you know what? I was exhausted, dudes! These were a lot of steps as it was - by all means, take some shortcuts!


Now, finally, you have your delicious, sweet, chocolatey tacos. Bet you never thought you'd hear that - chocolatey tacos.


Munch these the same way you'd eat a tiny taco - head tilt and all - and yes, ohhh yes they are messy but that's part of the fun!


So go ahead, make a dessert taco. Have one. Have two!


Go nuts and stick one on a cupcake, because who's going to stop you? No-one, that's who! Taco cupcakes! Taco cupcakes for all!

... Ahem, pardon me. I think I really am a bit over-tired. That doesn't really explain why I stuck one on a cupcake, though, I guess, since I made these last week, but, uh... It seemed like a good idea at the time?

And if anyone out there knows how to make the perfect tuille, or can tell me what I did wrong, please, I would love your input, thank you!

In any case, I hope you'll try something different and creative for the dudes - and hey, even the dudettes - in your life and have a real great time doing it. For more awesome desserts for dudes ideas, keep an eye on the Bake at 350 blog - a variety of bloggers will have their different ideas linked at the end of the month. I'm really looking forward to seeing everybody's contributions!

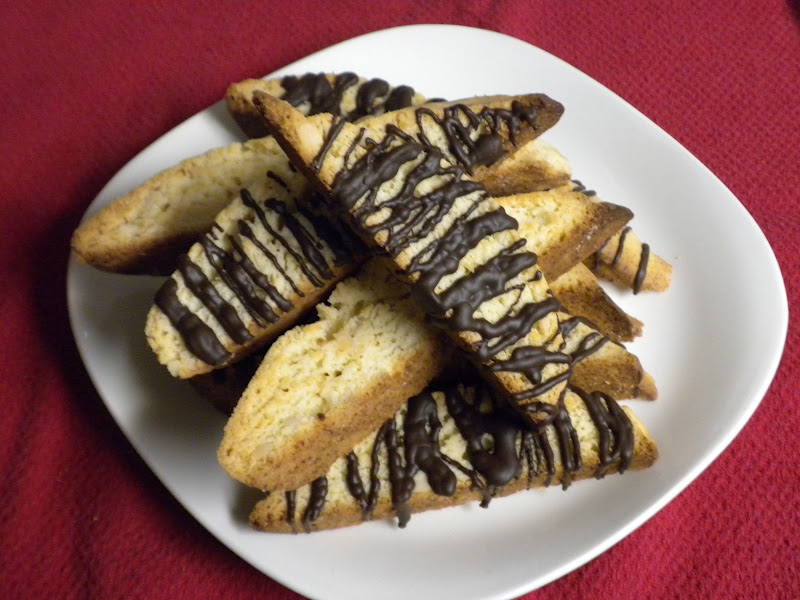
Another little teaser... Those cookies I've been working on this week? They're for a convention happening this weekend somewhere in the North-East-ish USA. Hubby Jon and Bro Duck are both going, and delivering the cookies for me to some very special recipients. If we're lucky, I'll have some pics of these fine folks to share with you all when the boys return home. The cookies are... well, a dessert for a very specific subculture of dudes, let's say. Any guesses?

Anyway, I've babbled on long enough, and really should get going - I have cupcakes to bake, a bag to pack and hopefully 40 winks to catch before I'm off to work the whole Canada Day holiday weekend at my fireworks shop job. It is gonna be insane! If I survive, I'll see y'all next week.

Until next time!

Thursday 21 June 2012

Homemade Biscotti To Make Dad Proud

So... Some of you may have noticed I didn't post anything even mildly Father's Day related.

You see, I had planned to make some awesome sugar cookies depicting all my Dad's favorite things, but then I found out Dad was going to be out of town that weekend. And this weekend. So, I never did make those cookies.

But, I did have Dad on the mind when I found out my workplace was having a cultural day, where we were to bring snacks and treats from our different backgrounds. Dad's side of the family is largely Italian, and nothing says Italian quite like homemade biscotti!


Like most cookies, biscotti start with creaming together sugar and butter. I used a hand mixer to save time, but you could do this by hand.


Next add six - yes, SIX - eggs one at a time, mixing in between additions.


Once all the eggs are added, throw in your flavorings. Some vanilla extract and some...


Anise extract. I had never used this stuff in my life. I always heard anise smells and tastes of black licorice, and I hate black licorice! I wish I could remember what comedian it was who said, and I paraphrase:

"Black licorice - what is that, sugar and hate?"

Yeah, something like that. But, every biscotti recipe I saw had anise in it in some form, and I wanted these to be as authentic as possible, so I went ahead and threw some in.

My apartment smelled like anise for the rest of the day. Augh! Oh well.


In a separate bowl, sift together your dry ingredients - flour, salt and baking powder.


Then, toss in some slivered almonds. Finally, throw the dry ingredients into your bowl of eggy sugary buttery anise-smelling mess.


You can start mixing it by hand, but toward the end you may need to get in there with your hands to be sure all the flour gets incorporated.


The dough stays sticky, so, be prepared to have gooey dough hands. Gooey, anise-smelling dough hands.


Once your dough has come together, divide it into 4 portions...


Plop 2 portions each out onto a large baking sheet, and form into semi-flattened log shapes. Then bake at 350 degrees for 25-30 minutes.


When they come out of the oven they should be golden and just starting to brown around the edges. While your second pan is in the oven baking, and while these first logs are still hot, there is more work to be done! These ain't biscotti yet.


I used 2 large spatulas/lifters to move the hot loaf of cookie to a large cutting board. Then, cut it into diagonal slices ~ 1/2 inch thick.


Like so. Repeat for the other baked loaf, and arrange the slices on their cut sides back onto the baking pan.


Once your second batch of loaves is done, pop these into the oven again for about 7-10 minutes.


Pull 'em out, flip 'em all over, and put them in the oven yet again to toast the other side for another 7-10 minutes. Do the same for all batches and you're done.

My friends, you have biscotti! But why stop there?


Why not use up that amazing dark chocolate you got as part of a gift basket and have been saving for just such an occasion? (Or, you know, go buy some chocolate if you didn't get a gift basket, I guess.)

I just put this in the microwave on high for 20-30 second intervals, stirring in-between, until it was liquid enough to drizzle.


And drizzle I did! There was enough chocolate to cover just over half the biscotti, but I had intended to leave some plain, anyway, since I was taking them to work to share and not everyone likes dark chocolate.

They don't know what they're missing!


As long as we're feeling Italian, let's fire up the espresso machine and brew a tiny, tiny cup of hyperactivity juice!


Now if that don't fuel your morning, I don't know what will.


Except maybe more biscotti! I must say, though the anise flavor is present, it is not overpowering, and is a lovely complement to the vanilla and almond notes, so don't skip it! Even if it does stink up your kitchen for several hours. It's worth it.

I used this recipe, but added the chocolate drizzle because... well, nobody tried to stop me. Everything's better with chocolate! A couple of notes on the recipe, though:

  • It tells you to knead the dough - I think it means 'mix by hand'. This dough is much too soft for real kneading.
  • The recipe states that after you cut and arrange your slices on the pan, you should ' Toast on one side, then turn them over to do the other side. This will take about 7 to 10 minutes.'  What it does not say is 'per side'. Toasting 7-10 minutes overall left me with soft, pale biscotti, and I had to toast it again.
So, take a stab at biscotti! It's time-consuming but not nearly as difficult as I thought it would be. Also, some of my co-workers are now complaining that the coffee shop biscotti tastes awful now, and it is all my fault. So beware of that.

Side note: I have something put together for Bridget's Dessert for Dudes Month, but that's for next week, so be sure to check back! In the meantime, check out all her awesome for-dudes-or-otherwise ideas at her blog Bake at 350.

Until next time!

Thursday 14 June 2012

Sweet Coconut & Fruit Sushi - a la Sprinkle Bakes!

If you're a fan of baking blogs, you have probably heard of Heather Baird of Sprinkle Bakes. If you haven't, hoo boy are you in for a treat! I myself am a rather new fan, largely because all my favorite baking blogs started talking about this amazing book coming out:

Photo courtesy of sprinklebakes.com
I immediately checked out Heather's blog and was beyond impressed. I started seeing examples from her book on my favorite blogs - Bake at 350, Bakingdom, Cookies & Cups - that was it. I entered every giveaway I saw to win my own copy of the book, but I didn't luck out in any of them, and finally bought my own copy. Definitely among the best purchases I've made!

This book is more than just a cookbook. It is a crash course in art fundamentals. Each recipe in this is a component of an edible art piece, and the more basics you master, the more you can create! I am so inspired by this book. I can't even explain.

So I'll just have to show you!


Can you even believe this is dessert? Kind of puts the sushi candy kit to shame. Kind of, I mean, I still love the kit, too, but this is way more gorgeous and elegant! Not to mention delicious.


The first step to this masterpiece was cooking up some sushi rice. I used Calrose rice, since that's what my local market happened to have, but any medium grain sushi rice will work well. You cook it up much like any regular rice, adding liquid and seasoning and bringing it to a boil, then covering it and letting it simmer for 20 minutes.

The twist here is the rice is cooked not in water or broth - but in coconut milk and sugar. I've never made a rice-based dessert in my life so this was a real adventure.


On the right, my coconut rice was bubbling away, while in the left pot more coconut milk and sugar was reducing to a nice syrup.


Once the rice is all cooked, it'll look a bit like this. Most of the liquid should be cooked away.


Once your coconut syrup is nice and, well, syrupy, pour it over your cooked rice and continue to cook over medium heat until the mixture is thick and sticky, then put it aside to cool completely.

I didn't let mine cook down quite enough because I got nervous about how off-white my rice was and worried cooking it much longer would turn it too brown. Don't be me, folks! Let the liquid cook off! My rice was a bit too wet in the end. Oh well, live and learn!


This plastic-wrapped lump is some home-made modeling chocolate, another recipe from the Sprinkle Bakes book. This was supposed to be used as a substitute for the nori strips used to hold the topping on nigiri sushi in place, but I got a crazy idea.

If it could be used to imitate the nori on nigiri, why not use it to simulate the wrapping on hosomaki - rolled sushi?


Well, reason one - modeling chocolate is kind of difficult to roll out thinly enough. But darn it, I'm stubborn! I kneaded it with my hands until it was malleable enough to be rolled out...


...Trimmed it into a rectangle, saving the leftovers for - you know, the thing they were supposed to be used for in the first place!


Just like making regular sushi - which, by the way, I'd also never done - I spread the rice over the modeling chocolate wrapper, over top of a parchment-covered bamboo sushi mat. That thing had been sitting unused in my drawer for a donkey's age.


I julienne'd a bit of honeydew and cantaloupe for my sushi filling and rolled it up just like you would a real sushi roll... or so I hoped!


It was a tad difficult, because the chocolate was still a bit firm and didn't want to cooperate. Some of the rice squeezed out the edge, but I somehow managed to get it rolled up pretty well...


Like so. Then I used a sharp knife to slice it into individual pieces. I didn't get a good pic of those by themselves, but there's more coming so hang tight!

With the remaining rice, I formed little rectangles about the size that real nigiri sushi would be, using just a smidge less than 2 tablespoons of rice per piece. If you have a nigiri mold, by all means, use it and safe yourself some time! I don't have one, though, so I formed all the rice shapes by hand.


For the nigiri-type sushi, I needed some 'fish' for topping them. I couldn't find dried papaya like the recipe called for, so I substituted dried mango slices. I had to do some fiddling to get these to lay flat and resemble salmon, but I think I did a pretty good job:


Forgive the fuzzy pic, I really need to get a better camera or learn to focus mine better. In any case, I flattened the fruit pieces out by working them with my fingers, and used a sharp knife to trim them to size.

Just for fun, I also scored some lines onto the fruit to resemble the texture of fish.


And voila! A sweet, coconutty and fruity dessert with a hint of chocolate. I never would have thought of making something like this in a million years, I don't know where Heather gets her amazing ideas, but I hope she never stops!

In case you're wondering, I ran out of dried mango and used honeydew slices to cover some of these... I'm just going to pretend they represent avocado.


When I saw how awesome these were turning out, I was driven to dig out all of our Asian serving ware to devour them properly.


I even busted out the soy sauce server. Oh, don't worry, that's not real soy sauce, of course, but a beautiful syrupy chocolate sauce! I used the leftovers of this sauce on fruit for days afterwards. I might even make it again just to dip fruit into - it is absolutely delicious!


So uh... if no-one minds, I'm just gonna show off a bit now. I'm really proud of how this turned out!


Dipping the 'nigiri' into the 'soy sauce'... My mouth is watering looking back at this. And I don't usually even like rice and fruit desserts!

Hubby wanted everyone to see his neato samurai sword-handle chopsticks, too.

You know who is absolutely mad about rice desserts, though? My husband. Somehow, overnight, we went from having a near-full batch of these beauties - I had managed to control myself enough to eat only 3 or 4 - to having precisely 2 left. Yeah. So if someone in your house really likes rice desserts already, you might want to guard these extra carefully.

Want to know something extra awesome? I had emailed Heather herself shortly after I got the book, asking permission to share the recipe for this with you guys. I didn't hear back, and as the weeks passed, I worried that I would have to wave these delicious photos in all your internet-faces and leave you hanging with no how-to, but with miraculous timing, Heather wrote back just this very morning and said it was fine to share the full recipe!

You guys are so lucky!

So here's how you can make your own, amazing fruit sushi!

Sweet Coconut Sushi with Chocolate "Soy" Sauce
From Sprinkle Bakes, courtesy of Heather Baird
[With comments and additions by me, in square brackets.]


Ingredients:

Sushi
1/2 Cup sushi rice, medium grain, such as Nishiki
One 14-ounce can coconut milk
1/2 Cup sugar
20 very thin strips of dried papaya, fresh [or dried] mango, or orange segments [or even honeydew melon, apparently]
5 oz modeling chocolate, rolled thin and cut into strips

"Soy" Sauce
2/3 Cup unsweetened cocoa
1 2/3 Cups sugar
1 1/4 Cups water
1 teaspoon vanilla extract

Equipment:
Nigiri-sushi mold (optional)

Make the sushi rice:
1. Combine the rice, 1 cup of the coconut milk, and 1/4 cup of sugar in a medium saucepan and bring to a boil.

2. Reduce heat to low and simmer, covered, for 20 minutes or until liquid is absorbed.

3. Remove from the heat and let cool slightly.

4. In another saucepan, boil the remaining coconut milk with the remaining 1/4 of sugar until thick and syrupy.

5. Pour the syrup over the cooled rice and cook over medium heat until thick and sticky. When it has finished cooking, there should be very little liquid remaining in the saucepan. Remove from the heat and allow the rice to cool completely.

Form the sushi:

1. When the rice cools, press spoonfuls into the nigiri-sushi mold cavities. If you aren't using a sushi mold, place dollops of rice (about 2 level tablespoons) [I used a bit less than this, perhaps a tablespoon and a half] on parchment paper and form into rectangles with your fingers. If the rice sticks to your hands, fill a small bowl with water and wet your fingertips for easier shaping.

2. Chill the shaped rice in the refrigerator for 30 minutes, or until the rice can be unmolded without sticking [or, in the case of hand-formed pieces, picked up without falling apart!]

3. Slice dried papaya makes a good faux raw salmon. Trim the papaya [or fruit topping of choice] to match the size of the rice bundles. After unmolding the rice, place the nigiri pieces on parchment and top with thinly sliced dried papaya.

4. As a substitute for nori (the seaweed used to wrap sushi), use chocolate modeling clay that has been rolled thin and cut into strips. You may also use soy sushi wrappers, which are mostly tasteless and come in a rainbow of colours. Press the ends of the chocolate strip together on the bottom side of the nigiri and serve on sushi platters with chocolate soy sauce on the side.

Make the "Soy" Sauce:

1. In a medium saucepan over medium heat, combine the cocoa, sugar and water. Bring to a boil and let bubble for 1 minute.

2. Remove from the heat and stir in the vanilla. If not using immediately, transfer to a jar and store in the refrigerator, and heat again before serving.

***


And there you have it! Yes, these sweet sushi are a bit of work, but it's fun work! And even more fun when you show these off to your friends and family and explain that they are, indeed, dessert!

So set aside a few hours one day and give these babies a go! You will not regret it. I certainly don't.

Except that, you know, a certain hubby keeps looking at me expectantly. Like he wants me to whip up another batch. Every day. I might have to go pick up some more dried mango.

In any case, thanks so much for reading, and definitely check out Heather's blog and her awesome cookbook! You definitely won't regret it, and all the staring-expectantly-significant-others in the world won't change that.

Until next time!