Thursday 26 January 2012

Ducks from the past

Hey all. I feel pretty lame for letting the blog slip behind in updates already but let me tell you why.

Reasons.

Really though I have the head cold from hell and until it struck I'd been keeping extremely busy helping a friend redo her apartment and I just had no energy or drive at all to bake. And if you knew me personally you would know that that is a very, VERY strange thing.

So I at least wanted to share something with you, and I dug up some old pics from my brother's last birthday:


Duck cupcakes! (Duckcakes? Cupducks? Hmm.)

See, my brother's nickname is Duck, so when I saw these in the cupcake book I got for Christmas 2010, I just knew they were the perfect thing for his birthday party. He was turning 20, but hey, you are never too old for adorable cupcakes!

If you want full directions on how to make your own, well, you'll have to invest in a gorgeous little book called What's New, Cupcake? Check it out on Amazon: http://www.amazon.com/Whats-New-Cupcake-Ingeniously-Occasion/dp/054724181X/ref=sr_1_1?s=books&ie=UTF8&qid=1327616514&sr=1-1
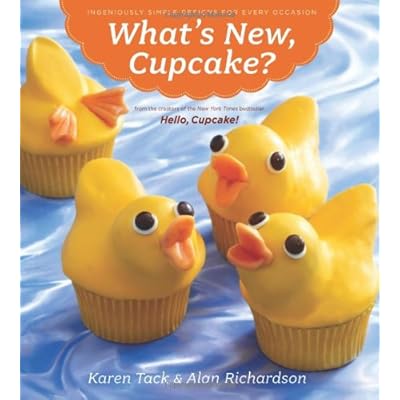

And clearly, whoever made the duckcakes on the cover did not have nearly as much trouble as I did.

If you're going to do these, my one tip is: When you're inserting the beaks (which are made from smushed up and re-shaped Starburst candies) use a small knife to make a dent into the head to insert the beak into. This was the only way I found to keep the beaks from constantly falling off.

Even then, there were some casualties. I had to eat a few to hide the evidence. The noble sacrifice of those first ducks will not be forgotten.


Here's one of the better specimens. I call him Lumpy. (I also have to apologise for the terrible quality of these photos, they're even worse than my usual!)

The cup cakes are made from my favourite Bonnie Butter Cake recipe which I will likely share sometime next week. See, I have 2 cakes to make this weekend, one for my friend whose apartment we've been working on, because her birthday just went by this week, and one for my brother because this coming Monday he's turning 21! My, how time flies.

This year he's expressed interest in cakes featuring everything from Batman and the Ghostbusters to Weird Al Yankovic and My Little Pony. I don't know what I'm going to do, but I'll have to figure something out fast!

Oh, I should mention that Duck actually goes by the name PsychoDuck21 on the internet, and for a long time his icon was a giant rubber duck frothing at the mouth.

So I made a very special duckcake just for him:


A Psycho Duck Cake!

Well, I hope that'll tide y'all over until I'm well enough to bake up those birthday cakes and take some good pictures. Right now I'm a little loopy what with the head cold and the crazy strong cold meds I took to fight it.

That Mr Buckley is hardcore.

Until next time!

Tuesday 17 January 2012

A Quickie Cookie Post

Spent over 5 hours baking and packaging cookies today!

My hands are far too cramped* to write up a proper post about it, but I at least want to show a bit of what I've made:

On the right, classic chocolate chip cookies, and on the left their fabulous cousin triple chocolate chip cookies - with white, milk, and semi-sweet chocolate chips! Mmmm.


And here a delicious stack of peanut butter cookies hogs the camera while double peanut butter - that's peanut butter cookies with peanut butter chips added - sneaks up behind for a photo bomb.

I don't think I said peanut butter enough times just now.

Peanut butter.


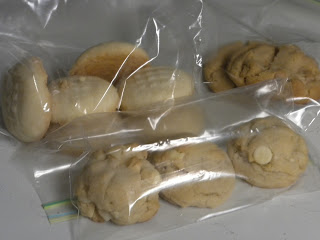
Shortbread cookies and plain sugar cookies... I was kind of sad that the person who asked for these didn't want any decoration on them! Sugar cookies look so naked with no decorator's sugar or royal icing.


And finally, my very favorite: white chocolate macadamia nut cookies. Oh man, if those nuts weren't so darned expensive I would make these babies all the time. All the time.


Just look at that. It's all I can do not to lick my screen right now. These are just bursting with macadamia nuts and white chocolate. Mmmf!


All told, I baked and packaged 14 dozen cookies today, that's a grand total of 168 cookies in these simple little bags with pretty ribbons. Each variety of cookie has its own colour-coded ribbon too. I'm weird like that.

Now of course, cookie recipes rarely make exactly how many they're supposed to, which brings me to my final point:


Leftovers! Quite possibly the hardest part of making a large order of cookies is not eating them as you go along, especially when they're hot and gooey and aromatic straight out of the oven! Which is why the very best part is the odds and ends left behind when all is said and done.

Once I've delivered the packaged cookies and done some chores tomorrow, I know a couple of friends who will be more than happy to help me 'clean up' these leftovers.

Until next time!

* I mixed nearly everything by hand, with the exception that I used a hand mixer to cream the butter and sugars for the chocolate chip varieties. So yeah, hands = ouch. I'll either have to get used to that or get a stand mixer one of these days!

Sunday 15 January 2012

Oh, Thank God we Have Banana Bread!

I will giggle wildly if anyone can correctly place the quote I used for this blog title.

Banana bread!


Just look at that golden brown top. I can almost smell the bananas.

In any case, I thought I'd actually share the recipe this time round, since this bread is a 100%, tried, tested & true old family recipe! (See, that previous post... I'm still ironing out the kinks but when I've got it just right I'll be sure to share it!)

And if you don't believe me that this is an old, handed-down, we-begged-my-great-aunt-to-please-please-share-it recipe, check this out:


See? Hand-written, beaten up, and marked with the thousand stains of a thousand perfect banana bread batches. If you can't see it so well, I'll repeat the recipe here:

***
1 C Mashed bananas
1/3 C Shortening
1/2 C Sugar
2 Eggs
1 3/4 C Flour
1 tsp Baking powder
1/2 tsp Baking soda
1/2 tsp Salt

Mix together and bake at 350 degrees fr 40-45 minutes.
***

Aw, it doesn't look nearly as fun all typed out. I do want to mention that I don't quite follow this recipe exactly, but let's start at the beginning:


Mash the ever-loving heck outta your bananas! When I was younger I thought this was gross so I always made my Mom do it while I measured out the ingredients. Now that I'm living in my cosy little basement apartment and I have to do it all myself, I've actually found out that this is the most fun part!


The recipe says you want a cup but from my experience if you have a little more - up to a 1/4 cup extra -it actually makes for a moister, more flavorful bread. So with that put aside, it's time to cream together your shortening and sugar -


... Or you could be like me and use Becel instead. One day I switched it in because I didn't have shortening - and I liked the result so much I do it every time now! The basic difference is, with the shortening, you get a slightly denser, cakier texture and with the Becel it's a little lighter and breadier. So go with what sounds good to you!

You could even be super decadent and go for butter, y'all.

So cream the fat of your choice together with the sugar, THEN add the eggs.


Or you could get too excited because you want to try cracking eggs with one hand and taking a picture at the same time and forget to cream them together first. Oops. This isn't the end of the world though, it just means that getting the mixture smooth will take a little longer.


Yeah, this took a while. Little chunks of butter are okay by the way, but not a big clump like above. I know the original recipe says to just throw it all together and mix it but I find taking the extra little step of creaming the butter & sugar and then stirring in the eggs makes for a much more even batter.

Then it's time for the star of the show!


Oooooh yes lots of mushy bananas please! You know, it's funny, I hardly ever eat bananas any other way, but I get so excited about this bread!


Once the banana is all incorporated, throw the flour and other dry ingredients on and gently mix it until it just comes together. If you over-mix it it'll get tough!


That's just about perfect! (If I do say so myself...)


Into a nice, greased loaf pan. I just used PAM spray here for simplicity's sake. Also, I'm using a glass pan so I let it bake just a couple of extra minutes since it doesn't conduct heat as well as a metal pan.


Smoooooooth it out...


Let it bake...


Have a glass of cranberry juice! No, that's not in the recipe, but getting your nutrients is important and you've got to keep hydrated with all this slaving over a hot oven and all.

I'm going to have to bake something with cranberries now. Hmm.


Once your bread's out of the oven, let it cool a half hour or so. I usually flip mine out on a cutting board and let it cool upside down. Then it's ready to eat faster.
 

And can you blame me for speeding things along? Look at that bread. Beautiful. Just waiting for a bit of butter and a tall glass of milk.

And if you want to do something a bit extra special, add some mix-ins! I personally like to throw a 1/2 cup of walnuts in there, or maybe a cup of mini-chocolate chips. Whatever floats your boat!

My husband would probably put peanut butter chips in it. He'd put peanut butter in anything.

Well, that's all for today! I have some cookies to bake over the next couple of days, so if that goes well I'll tell y'all about that. Until next time!

Thursday 12 January 2012

Let's start things off with a... Failed cake?

Hello all! My name is Tamara and I'll be your Baker in the Basement for the evening.

Or, uh, until I'm done? In any case, moving right along:

I love to bake. It's my one true passion in life. I have just a tad of training from some part-time courses and a lot of home-baking experience, but I'm not going to sit here and bore you with all that. Not this post, anyway.

For this post, I'm just going to say that I live in a basement apartment and I love to bake, and one day I hope to truly claim the title of baker. But for now, here's a cake that turned out all wrong!


This was supposed to look like a big Reese peanut butter cup, as requested by a friend of mine. I should clarify: a friend I've had for over 10 years. A friend who was also my boss at the time since I was helping out with the busy season at the store he manages.

A friend who I right-out slapped because he was bugging me after a long day at the shop. Yup. I felt pretty awful about that and he took advantage of my guilt to weasel me into making this cake. So what went wrong? Well, let's start at the beginning.

Now, I didn't get pictures of mixing the batter (hey, I'm new at this blogging thing!) but that went pretty well. I just altered a yellow cake recipe to include peanut butter - something I'd done a few times before. This time, though, I decided to add peanut butter chips because I wanted to make the cake extra special!

That was mistake number one.


So... first off, right out of the oven, I could see that the top of the cake was a little bubbly-looking... I later realized I had over-mixed the batter. Mistake number 2. But, still, the cake looked moist and well-baked and at this point I thought all was well, until:


Oh, pants. It would not come out of the pan. Both layers were terribly stuck. I'd greased the pans well, I'd baked for the appropriate time, what went wrong here?


Oh... THE CHIPS. They all sunk to the bottom and clung to the pan like vengeful little barnacles. Yay.

Well, I eventually managed to wrench both cakes from their pans relatively intact and trimmed them down to be level.


Once trimmed, I added the first layer of frosting.


I have decided that next time I attempt this cake, I'm going to go with a smoother, glossier chocolate frosting. This cocoa butter cream was a little too rough around the edges.


The next step was to take these little babies and press them into the middle frosting layer, like so:


Now, I'm not going to number this one as a mistake, but I thought these guys were going to be, well, mini-er. So next time I'll have to account for their size a little better - might chop 'em up some so they'll fit into the middle layer better.


As you can see, I had to top it off with extra frosting to level it out.


A LOT of extra frosting!!


Stacked 'em up and slathered more cocoa frosting on there.


Now, I had a vision in my head for the sides of this cake. Nice, wide, vertical furrows just like on the side of a real Reese cup, only bigger! I even had the perfect cake edger in my drawer.

The right size and angle, I knew it would be perfect! If only I could find the darn thing.

To be fair, I did find the right edger. The next day. After the party where I served the cake. So, in the meantime I had to use this less-appropriate edger.


I still got decent striations, but it just wasn't what I'd pictured.


Did my best to smooth out the top, but, again, the frosting wasn't really working with me.


So here she is, complete, a little wonky, and a lot messy. Mistake number - what are we on now?? - was to put this on completely the wrong kind of platter. The edges were raised and it made it practically impossible to get a clean plate edge without digging into and damaging the cake.

So. There you have it.


Now, despite all the little mistakes and mishaps, this cake went over incredibly well. I was officially forgiven for the face-slap. The cake was devoured by all present at the party and the unanimous vote was that it was moist, delicious, and not nearly large enough.

I'd like to make it again, with all the little notes I've made here in mind, and see what I can really do. But that's for another day.

Why did I start this blog with such an iffy post? Such a low note? Because I wanted to show a true picture of where my skill is right now, and that I'm definitely still making mistakes. But mistakes are important! Mistakes are how we learn.

I want to look back at this post sometime down the road, and see how far I've come. I want to figure out how to keep the chips from sinking (tossing them in flour before putting them in the batter has been suggested)  the frosting that will look like real chocolate when it sets, and how to get the perfect furrows up the sides.

And when I can do all that, I'll still know exactly where I started.

Thanks for coming along with me for this journey - it can only go up from here!

Now if you'll excuse me, my banana bread is just about ready to come out of the oven, but that's another post.