Yes, you read that right.
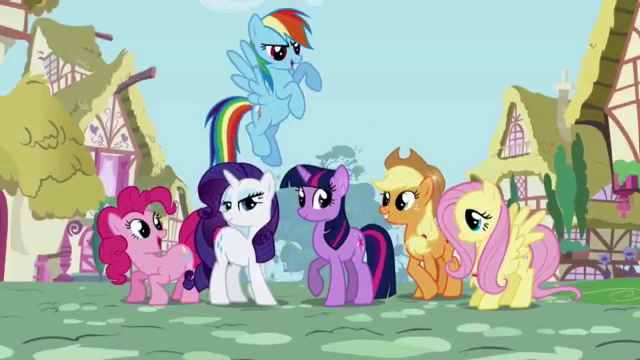
And two of those bros who love ponies happen to be my husband and my brother. So when they vowed to attend the convention, I vowed to send along a treat for them and some of their favourite fellow fans. Now if you've ever watched My Little Pony - the classic 80's series, or the new one - or bought one of the toys, you probably remember that the ponies have little symbols on their flanks that represent their talent or true calling. They're called Cutie Marks, and I thought I could make them into some Cutie Cookies!

The first order of business was to bake 3" round sugar cookies and let them cool completely. Then I made some 20-second icing - which I have never done before! - and tinted portions of it in 8 different shades representing the coat colours of the mane six ponies plus a couple of favourite side characters.
Then I simply made a large circle of icing on 6 cookies in each colour and left them to firm up and dry completely overnight. The next day, I dyed some more 20-second icing in the ponies' complementing mane colours and made a pearl border around each icing circle.

This was a 2 (or more!) step process. First, I went in with the darker blue and did dots all the way around, leaving enough space between them for dots of similar size, then let them set at least 20 minutes. Once set, I went in with the secondary colour and filled in the gaps.

For one particular cookie design, whose corresponding pony has rainbow hair, this was a 7-step process! I really, really hope the recipients of these ones liked them because my goodness they were a lot of work!

For some cookies, I started the interior decoration while the first dots were still setting, for others I started once the borders were complete. Working on 8 designs at once, I kind of bounced around from one to the next as I hit upon the right colour combinations in my icing.
Can you tell what these are?

Maybe the stems being on there will help. They're 3 cute little apples. For some reason, these are one of my favourites of the designs!

Some of the Cutie Mark designs, like this triple-diamond mark, took several steps as well. I didn't get full how-to and process pics because I just had so much to get done, but you can see here that I started with light blue diamonds, let them set a while, then went back to add the slightly-darker-blue detailing.
When all was said and done, this set of 48 cookies took over 12 hours of work! But I think it was pretty much worth it. Just look at these finished cookies...

This cookie was undoubtedly the easiest of the bunch to make. It's not totally perfect, but I wub it just the same.

Honestly, a lot of hard work went into this cookie, and I think it deserves a blue ribbon. How do you like them apples?

I'm really happy with how this cookie turned out. It makes me want to smile, smile, smile! Seriously though, this is probably the closest I got to matching one of the mane six's cutie marks.

Let's see... soft violet background? Check. Purple and pink border? Check. Magenta star burst with white accent? Check aaaaand... check! Looks like that's everything we needed to make a Twilight Sparkle cutie mark cookie. Then again, maybe we should review the checklist one more time...

This one is based on one of my brother's favourites, Rarity, so I had to make sure it turned out absolutely fabulous. The border should have been 2 distinct shades of purple, but I couldn't get it quite right! Oh, of all the worst things that could happen, this is the. Worst. Possible. Thing!
... Okay, not really. But I do wish this had come out better.
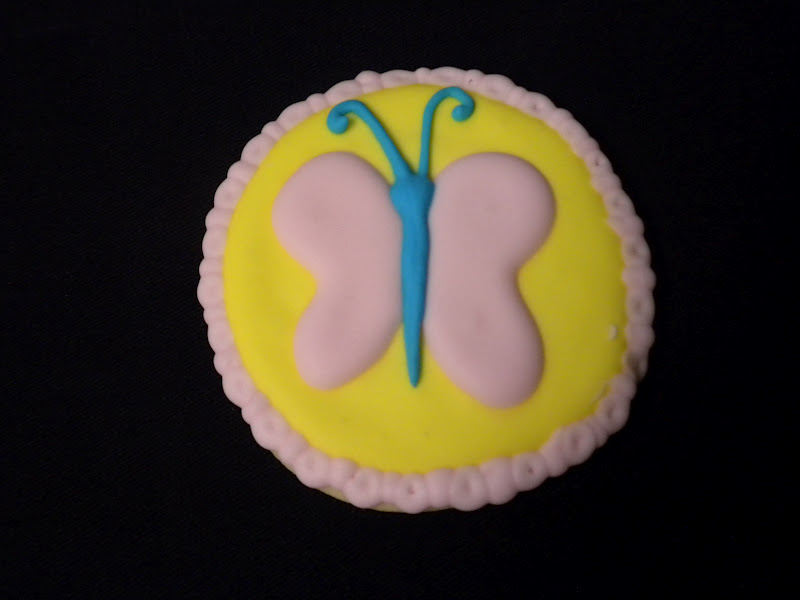
The cookies for Fluttershy didn't turn out as planned at all, there were supposed to be 3 butterflies for each cookie, but the pink icing got too runny and I foolishly tried to work with it anyway, so the wings all spread too much and the borders came out pitted. Oops...
Luckily, this one with just one butterfly turned out pretty well. Yaay! Oops, was that too loud? Sorry.

Here's another one, for a background pony who happens to be a fan favourite, but again I had trouble with the icing consistency and ended up with some pitting and running... I just don't know what went wrong!

I saved my favourite for last. This cookie represents the awesome Rainbow Dash. As I mentioned earlier, it took a lot of extra work to make this happen, but with that rainbow border it is at least 20% cooler than the others.

Altogether, I am pretty darn proud of these if I do say so myself. I think any pony fan could readily recognise who these represent.
Now if you'll excuse me, I'm actually just finishing up this post during my lunch break, so I simply must dash back to my desk. I have to make sure no-one's disturbed my pony collection that I brought in to show off today. The boys brought me back some cool trading cards and pins and...
Didn't I mention? Yeah, I'm totally a Brony too (or Pegasister if you want to be all gender-stereotypey) and now I want to make cookies for all the other background ponies, like Lyra and Bon-Bon and Carrot Top and Doctor Whooves and Mayor Mare and...
Oh, right! Back to work with me.
Until next time!
They are all great. I really like the Rainbow Dash one.
ReplyDeleteThanks! RD was the most work, but I think it turned out the best and was worth the extra effort :)
DeleteThese are FABULOUS!
ReplyDeleteLOVE THESE!
ReplyDelete